Breakfast Quesadillas With Black Beans, Spinach And Mushrooms

Don’t restrict these quesadillas to breakfast, they are delicious any time of day – for brunch, lunch or a light evening meal. You can replace the canned beans with 1½ cups cooked black beans if you like to prepare your own. The white corn tortillas we have tested have a low GI (52).

Preparation time: 10 minutes
Cooking time: 10 minutes
Serves: 4

  • 1 tbsp olive oil
  • 200g (7oz) button mushrooms, wiped clean and sliced
  • 1 garlic clove, crushed
  • 400g (14oz) can black beans, drained and rinsed
  • 1 vine-ripened tomato, diced
  • 4 large wholegrain tortillas
  • ½ cup grated cheddar cheese
  • 1 cup firmly packed baby English spinach leaves
  • Hot chilli sauce, to taste
  • Olive oil spray, for toasting
  • ⅓ cup natural yoghurt
  • Coriander (cilantro) leaves, to garnish

Method
1. Heat the olive oil in a large non-stick frying pan over medium–high heat.
2. Add the mushrooms and cook, stirring, for 3–4 minutes or until golden.
3. Add the garlic and cook for 30 seconds or until fragrant.
4. Add the beans and tomato and cook for 1 minute or until heated through.
5. Season to taste with sea salt and freshly ground black pepper. Set aside.
6. Preheat a sandwich press.
7. Spread a quarter of the mushroom mixture over half of a tortilla. Top with a quarter of the cheese, a quarter of the spinach leaves, and chilli sauce to taste. Fold the tortilla over to enclose the filling. Repeat with the remaining tortillas and fillings.
8. Spray the quesadillas on both sides with oil. Cook in batches in the sandwich press for 3 minutes or until the quesadillas are crisp and the cheese has melted. (Alternatively cook the quesadillas in a large non-stick frying pan for 2 minutes each side.)
9. Serve with a dollop of yoghurt, garnished with coriander.

How To Create Your Own Running Program

The simple fact is, a good running program should be developed around your own running goals and preferences. For example, a beginner runner to trains to lose weight will have a much different running approach than an elite athlete training for their next personal best. Your personalised running program should take into account:

  1. Fitness level
  2. Personality
  3. Personal preferences
  4. Training background and history
  5. Schedule
  6. Short- term running goals
  7. Long- term running goals
  8. Ultimate fitness objective

STEP 1 – Assess Your Fitness and Health

You need to address your fitness levels, needs and personal needs. You would also need to know what you are good at and what needs improving. Since you are doing this for you – YOU can sit yourself down and ask yourself if you are out of shape, have chronic injuries, aches or pains, high blood pressure and within a healthy weight range? If you do have any of these then you should ALWAYS check with a certified physician before getting started, never ignore it. If you are completely OK with all of these then great – onto the next step.

STEP 2 – Assess Your Time/ Schedule 

You will need to assess your schedule, calendar and time. Pull out your calendar and answer these questions and assess the weeks and months ahead of you. How many days a week do you want to exercise? How may hours per week you’re willing to exercise? Which specific days of the week work best? When can you start? Where will you run? Schedule your runs choosing the 3-5 days per week in which you’ll train, and on the off days try doing other (cross training) activities such as walking, yoga, foam rolling etc. Keep in mind consistency is key in creating a successful running program.

STEP 3 – Set The Right Goals 

Set clear and well defined goals and everything will fall into it’s place. The specific elements of your training program depend on your ultimate training purpose. Some questions to consider are – What are your ultimate fitness goal/goals? Why do you want to start running? What do you want from running? What are long/ short term running and fitness goals? As a rule of thumb your goals must be SMART (specific, measurable, set within a time limit, challenging yet, realistic). It can even be as simple as setting a goal such as , “be able to run for 45 minutes non stop”.

STEP 4 – Choose The Workouts 

In general aim for 3-4 hours of total running time per week, ideally at least 3-4 separate sessions. This will of course, will vary depending on your running goals and fitness levels. On the off days you can choose to cross train or rest. Incorporate in plenty of different types of runs of different distances and training paces. Variety will help you reach your full running potential. Different running workouts include: easy runs, recovery run, interval repeats, ladder runs, pyramid runs, progression runs, tempo runs, fartlek runs, hill reps, strides and long runs.

For Cross training days pick 3 days of active recovery. During these rest or cross training days keeping your body moving without putting too much pressure on it can help build the habit of daily exercises in your life while further improving your aerobic conditioning and muscular strength. Some examples of cross training sessions are: walking, swimming, spinning, yoga, rowing, Pilates and foam rolling.

STEP 5 – Choose A Weekly Workout Template

Intermediate training template (ONLY EXAMPLE)

Monday: 45 – 60 min asy effort running

Tuesday: 45-60 min Cross training

Wednesday: 8 X 400m @ 85% max effort

Thursday: 30-45 min Cross training

Friday: 30-45 min Fartlek running

Saturday: 75-90 min long run at a conversational pace

Sunday: Rest day

Create your own according to your schedule and think harder runs such as intervals, hill reps, and long runs with easy paced recovery workouts that are neither intense nor long. A written plan may hold your accountable ad help you stay on track. Grab a journal and jot down the days of the week along the side, then decide on what to do each day: run, cross train or rest. Write down everything running and exercise related so that you can compare yourself against a previous benchmark. Any questions ask your RIM PT!

Chocolate Zucchini Cake with Greek Yoghurt Honey Choc Ganache

This super delicious healthy cake recipe will take 15 minutes to prepare, ready in 55 minutes so if you have a spare Sunday to do nothing at all, treat yourself to some yummy chocolate cake with 0 guilt!

INGREDIENTS

Zucchini Cake

  • 3/4 cup Olive oil or Canola oil
  • 1 cup Honey
  • 2 tsp Vanilla extract
  • 2 large eggs
  • 3/4 cup Greek yoghurt
  • 2 cups Whole wheat flour
  • 1 1/4 tsp Baking soda
  • 1/2 tsp Baking powder
  • 1/2 tsp Salt
  • 3/4 cup Dutch- process cocoa powder
  • 3 cups grated, peeled Zucchini
  • 1 cup semi- sweet Chocolate chips

Ganache

  • 1/4 cup Honey
  • 3 1/2 tbsp Coconut oil
  • 1/2 tsp Vanilla
  • 1/4 cup Dutch- process cocoa powder
  • 2-4 tbsp Greek yoghurt

METHOD 

  1. Grease a 12 cup bundt pan or 6 cup if you want to make half. Preheat your oven to 350°F / 176°C. For the cake, combine the honey, oil, and vanilla in a large bowl. At first it’ll be difficult to get the honey incorporated, but it’ll work. Stir in the eggs and then the Greek yogurt. Set this bowl aside.
  2. In another large bowl, combine all the dry ingredients. Sift the cocoa powder into the bowl if it’s lumpy, or just use a fork to get rid of the lumps. Add the wet mix to the dry mix and stir, just until combined. Fold in the zucchini and the chocolate chips.
  3. Bake the full recipe for 40 minutes, or if using half, bake for 30 minutes. When you insert a toothpick in the middle, the toothpick will not come out dry, or even with crumbs, but it’ll come out covered in sticky batter. If you insert it, and it’s just normal batter, it’s not ready. Sticky batter is what we’re looking for! It’ll continue to cook once it’s out of the oven.
  4. Let cool in the pan for 10 minutes and then flip out onto a wire rack to cool. Cool completely before putting on the ganache. If using the following ganache recipe, store cake covered in the fridge. Otherwise, room temperature is fine.
  5. For the ganache: Over low heat, melt the honey and coconut oil and in a medium saucepan or pot. When melted, add the vanilla and then the cocoa powder. Stir until thoroughly combined. It might look weird, like it isn’t combining.
  6. Place in the fridge for 5 minutes. Take out and add a tablespoon of Greek yogurt at a time, stirring after every one. It should be pourable at this point. Not too hot and not too cold. Pour over the cake and store any leftovers in the fridge.

Cannoli Pancakes

Great weekend recipe – treat yourselves every now and then to some dessert for breakfast!

INGREDIENTS

  • 2 c. heavy cream
  • 1/3 c. powdered sugar, plus more for garnish
  • 1 tsp. cinnamon
  • pinch of nutmeg
  • 1 c. ricotta
  • 2 c. mini chocolate chips, divided, plus more for topping
  • 1 box Bisquick, plus ingredients called for on box
  • 1 tbsp. butter
  • 1/4 c. Powdered sugar, for dusting
  • whipped cream, for garnish

METHOD

  1. In a large bowl using a handheld mixer, beat together heavy cream, powdered sugar, cinnamon and nutmeg until stiff peaks form. Fold in ricotta and 1 cup chocolate chips. Set aside.
  2. Make pancakes according to box instructions, with the addition of the remaining cup chocolate chips.
  3. In a large skillet over medium heat, heat butter. Make large pancakes, then stuff with ricotta mixture and fold like a cannoli.
  4. Garnish with powdered sugar, whipped cream and more mini chocolate chips. Serve.

How To Be Productive Before & After a Long Weekend

Once you get back into the office to get back to your list of emails to reply to and meetings to attend with only 4 days to get your job done – you may freak and start to panic. But before you sign off….

  1. Reorganise your schedule for a 4 day week. Before you completely log off before the long weekend, take a look at your calendar for the week ahead. Reschedule your appointments that fall on the day off and then reorganise the rest of your week so your schedule isn’t overloaded with meetings the second you get back to the office.
  2. Set expectations with your out of office message. If you know you won’t be able to respond to emails until the end of your first day back, tell people that in your out of office auto reply. If you want people to flag urgent matters for you, ask them to write “urgent” in the subject line. Whatever your style is for getting back to work when you’ve been away from your inbox, let people know so they can help you stay sane when you get back to the office.
  3. Block off time for responding to emails in advance. Book yourself off a window of time to dedicate solely to replying to emails. If you schedule this before you leave the office, you won’t be scrambling on your first day back trying to balance everything you need to do.
  4. Create a reasonable to- do list for your return. While it’s fresh in your mind, make a list of what you have to prioritise when you get back into work. It’s easier than trying to remember it 3 days later and your future self will thank you for getting organised in advance.
  5. Schedule emails, blog posts and social media posts that need to go out on the holiday. Don’t forget to schedule marketing emails and social media content to go out while you’re away from your desk.

When you get back to work……

  1. Check in with your team. Whether it’s virtual or in- person, have a quick stand up meeting with your team to review what everyone’s focusing on to ensure nothing slips through the cracks. The meeting also gives you all a chance to catch up on how you spent your time of and how to prioritise the week ahead.
  2. Prioritise your to-do list. Take a look at your to-do list. It’s probably a bit longer than on a typical Monday. right? Sort through your list and determine what needs to be prioritised and what can wait until the next day.
  3. Triage your email inbox. Try organising your inbox using multiple inboxes, which help you organise to sort through messages in a way that makes them easier to work through when you get back into work. You could use labels like “needs action” or “to-do list” to easily visualise which emails are of highest priority. When you log back into your email sort and label your messages according to which needs replies immediately, and which can wait until later in the week.
  4. Don’t burn out. There is such thing as working too hard and burnout could end up sabotaging your productivity as the week goes on if you don’t take enough breaks. You might feel stressed at the thought of only 4 days in the week to accomplish your while to-do list. But remember to prioritise your list (point 2). Determine what ca be accomplished by one person over the course of a workday.
  5. Enjoy your long weekend. Last but not least, try to unplug when you have time off and make the most out of your time off by doing other fun activities outside of your job role. With the help of these points – RIM wishes you a great long weekend and great next week, too!

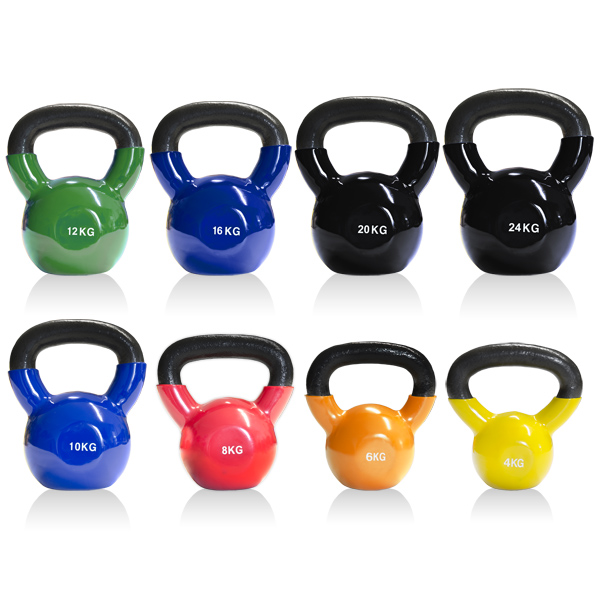
10 Benefits Of Kettlebell Training

  1. The reason for the surge in kettle bell training is that it gets back to basic training that requires functional, whole body fitness, a great way to get a whole body workout in a relatively short period of time.
  2. More coordination. Since the brain knows movements and not muscles, you become more coordinated with KB use. KB exercises train your body to work as a unit, This is also why athletes look different to body builders.
  3. It is the solution for busy people. They want the biggest bang for the buck. KBs can be the solution to trying to squeeze cardio, strength AND flexibility training in an already overbooked schedule. Because of the intensive nature, the workout duration must be kept short. Best of all, they are so small and portable training can take place even in your bedroom.
  4. Very different from dumbbells and barbells. Anyone who has picked up a kettle bell has felt the difference. The off centred weight of a KB recruits more stabiliser muscles and works the targeted muscles through a wider range of motion. It’s because of the off- centre design of the KB. Isolation exercises such as those done with dumbbells and barbells do not hit those stabilising muscles to the same degree.
  5. Strengthens every muscle from head to toe. Kettle bell training consists of whole-body movement exercises. It’s well- known that compound, whole body movements typical of kettle bell exercises are superior to machines that isolate muscles for improving muscle tone, body composition, and strength. Further, kettle bells strengthen the tendons and ligaments, making the joints tougher and less susceptible to injury.
  6. It’s enjoyable. Let’s face it, most exercise is boring. Kettle bell training is quick and enjoyable, which is one of the reasons you’ll stick with it.
  7. Build a lean, muscular physique. Men see that coveted wedge shape emerge as the training creates broad shoulders, defines abdominals, builds up their arms and pares down their waists. It’s a lean look, more like Bruce Lee than Arnold.
  8. Easy to learn. Movements are simple and you can start using them right away. No matter how old or how out of shape you are, everyone can do it and should be doing it.
  9. It’s cardio without killing your joints. The ballistic, but non-impact nature of KB work is the key. Instead, KB exercises actually strengthen your joints.
  10. Increase mental focus. You can’t just pick it up and mindlessly muscle it up and throw it around. It’s the thinking person’s workout. At each moment the lifter must be focused on the movement. The result is improved coordination and mental focus.

High Intensity Skipping Drill

After a quick high intensity workout that will get your heart rate pumping and endorphins running through the roof!? All you need is 15- 20 minutes of your day (depending on your fitness levels) and a skipping rope.

This drop set workout will work your entire body and will leave you feeling like a sweaty mess! Remember if something does not feel right, listen to your body and stop.

300 Skips / 30 Squat Jumps / 1 minute Plank hold

200 Skips / 20 Squat Jumps / 45 second Plank hold

100 Skips / 10 Squat Jumps / 30 second Plank hold

Mediterranean Tuna Antipasto Salad

This salad recipe is a great lunch time option and is diabetic appropriate, gluten- free, healthy ageing, healthy immunity, heart healthy and high fibre. 

INGREDIENTS

  • 1 15- to 19-ounce can beans, such as chickpeas, black-eyed peas or kidney beans, rinsed
  • 2 5- to 6-ounce cans water-packed chunk light tuna, drained and flaked (see Note)
  • 1 large red bell pepper, finely diced
  • ½ cup finely chopped red onion
  • ½ cup chopped fresh parsley, divided
  • 4 teaspoons capers, rinsed

METHOD

  1. Combine beans, tuna, bell pepper, onion, parsley, capers, rosemary, ¼ cup lemon juice and 2 tablespoons oil in a medium bowl. Season with pepper.
  2. Combine the remaining ¼ cup lemon juice, 2 tablespoons oil and salt in a large bowl. Add salad greens; toss to coat.
  3. Divide the greens among 4 plates. Top each with the tuna salad.
  • Note: Chunk light tuna, which comes from the smaller skipjack or yellowfin, has less mercury than canned white albacore tuna. The FDA/EPA advises that women who are or might become pregnant, nursing mothers and young children consume no more than 6 ounces of albacore a week; up to 12 ounces of canned light tuna is considered safe.

Best Methods For Muscle Recovery

Recovery doesn’t mean chilling in front of the TV or indulging in unhealthy food until you’re sick. What you do on off- days is just as crucial as what you do in the gym. Have a read and see how you can break the couch potato habit. Add New

  1. Promote Circulation By Working Your Joints. Even on your off day, by moving your arms, wrists and knees in low intensity circles. The opening and closing of your joint brings fresh synovial fluids to nourish, lubricate and hydrate these areas, while expelling waste and scar tissue. Rotate clockwise and counterclockwise to prevent imbalances and overuse injuries. Be careful not to hyper-extend, and keep circles tight to prevent excessive lateral motion so you don’t torque your joints.
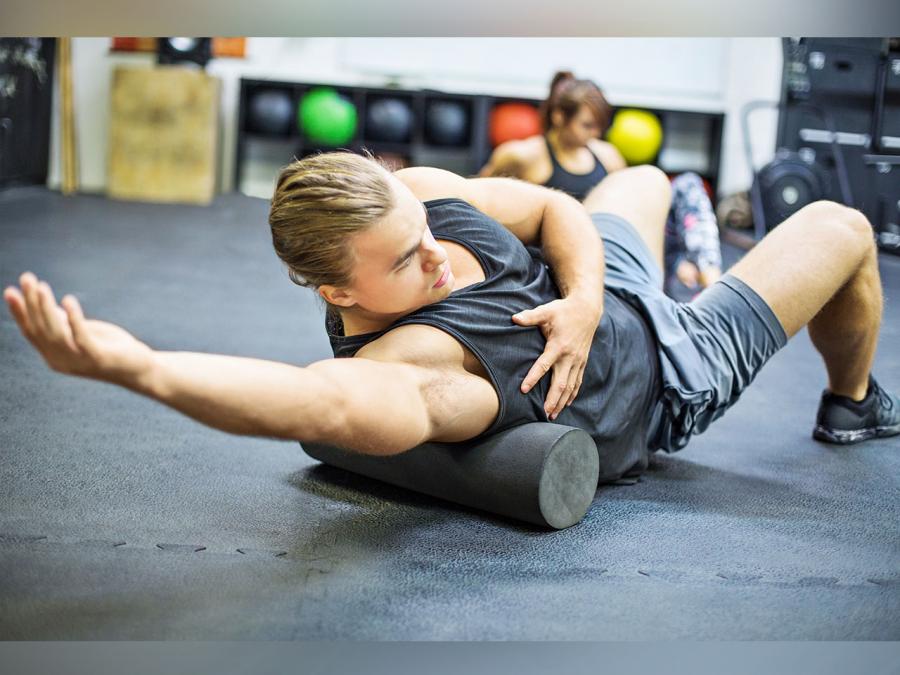
  2. Use A Foam Roller To Reduce Muscle Tension. If you’re feeling pain or tightness post workout, you can use a long, semi- soft foam tube to give your muscles a massage. Foam rolling breaks up scar tissue and knotting in your fascia, which if left unattended- can lead to nagging aches and paints in your joints. Spend at least 30-60 seconds minimum rolling your sore muscle group immediately upon waking, before bed and any time you can spare during the day- the more, the better.
  3. Get Some Sleep. It has been shown that lack of adequate sleep can decrease the reduce tolerance to training, alter mood, increase perception of fatigue and negatively affect the physiological mechanisms responsible for adaptation from the stresses of training. Hormonal secretion during sleep is one of the most important factors influencing recovery, after all the purpose of sleep is to induce a state of recovery in the body. Try for 8 hours sleep per night and/ or fit in an afternoon power nap for 30 minutes to rejuvenate the body.
  4. Hydrate. Dehydration can reduce performance potential, but also delay the recovery process. Exercise and an increased metabolic rate, both increase the body’s need for water and electrolytes. It has been suggested that the minimum amount of fluid intake per day for males is 3.7L/ day and 2.7L/ day for females. Be mindful of water lost from sweating, one source recommended roughly 1L of water for every 1000 calories expended.
  5. Get Your Nutrients. Recovery is a time where proper nutrition is essential. Protein sources are required to rebuild muscle tissue and to supply the building blocks for various cells, tissues, enzymes and hormones. Depending on how often you train during the week, protein recommendations can range from 1.0 to 1.6 grams of protein per kilogram of body weight PER DAY. Carbs on the other hand are the muscles major source of energy, therefore eating carbs is essential at refuelling your body’s glycogen stores. Your body refuels glycogen at a higher rate within 3.0 to 60 minutes post workout so it’s important to consume a post workout snack or shake during this time. It has also been shown that including a small amount of protein in this snack speeds up the rebuilding and recovery process.

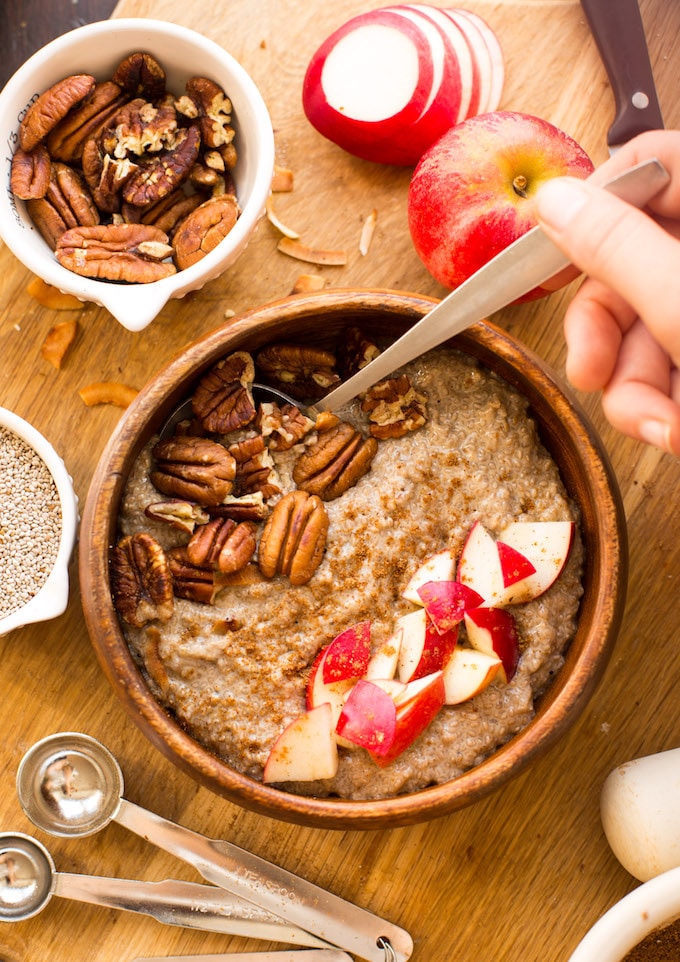
Warm Chai Chia Breakfast Pudding

Warm and cozy Chai Chia Pudding made in about 5 minutes. Gluten free, paleo and vegan friendly recipe serves one!

INGREDIENTS 

  • 2 tablespoons Chia Seeds
  • 1/3 cup Nut Milk
  • 1/2 teaspoon Chai Spice mix
  • 1 tablespoon Maple Syrup
  • 1/4 teaspoon Vanilla Extract

INSTRUCTIONS

  1. Add all of the ingredients to a small sauce pot on medium low heat on the stove top. Whisk everything together until combined
  2. Keep stirring until your pudding thickens up, about 5-7 minutes
  3. Taste and season with a little extra sweetener if you like. If it’s too thick add a splash of milk. Add any toppings you might like (chopped nuts, coconut flakes, fruit etc).